DIY Sharing and Permissions

Saving your report and Sharing/ Permission Basics

  • From the relevant DIY template report (e.g. DIY Service Client) you can build your report from the template and ‘save-as’ or you can ‘save-as’ straight away and build your report in the new copy.
  • Do not worry about overwriting the template report, as you can only ‘Save-As’, and changes are not saved to the templates.
  • Name and describe the ‘Save-As’ report adequately. If you are building numerous DIY reports you should use a naming/numbering system appropriate for your centre.  If you are creating a new reporting template with the intention of keeping the setting for future uses, then do not tick ‘Save Changes’ box.

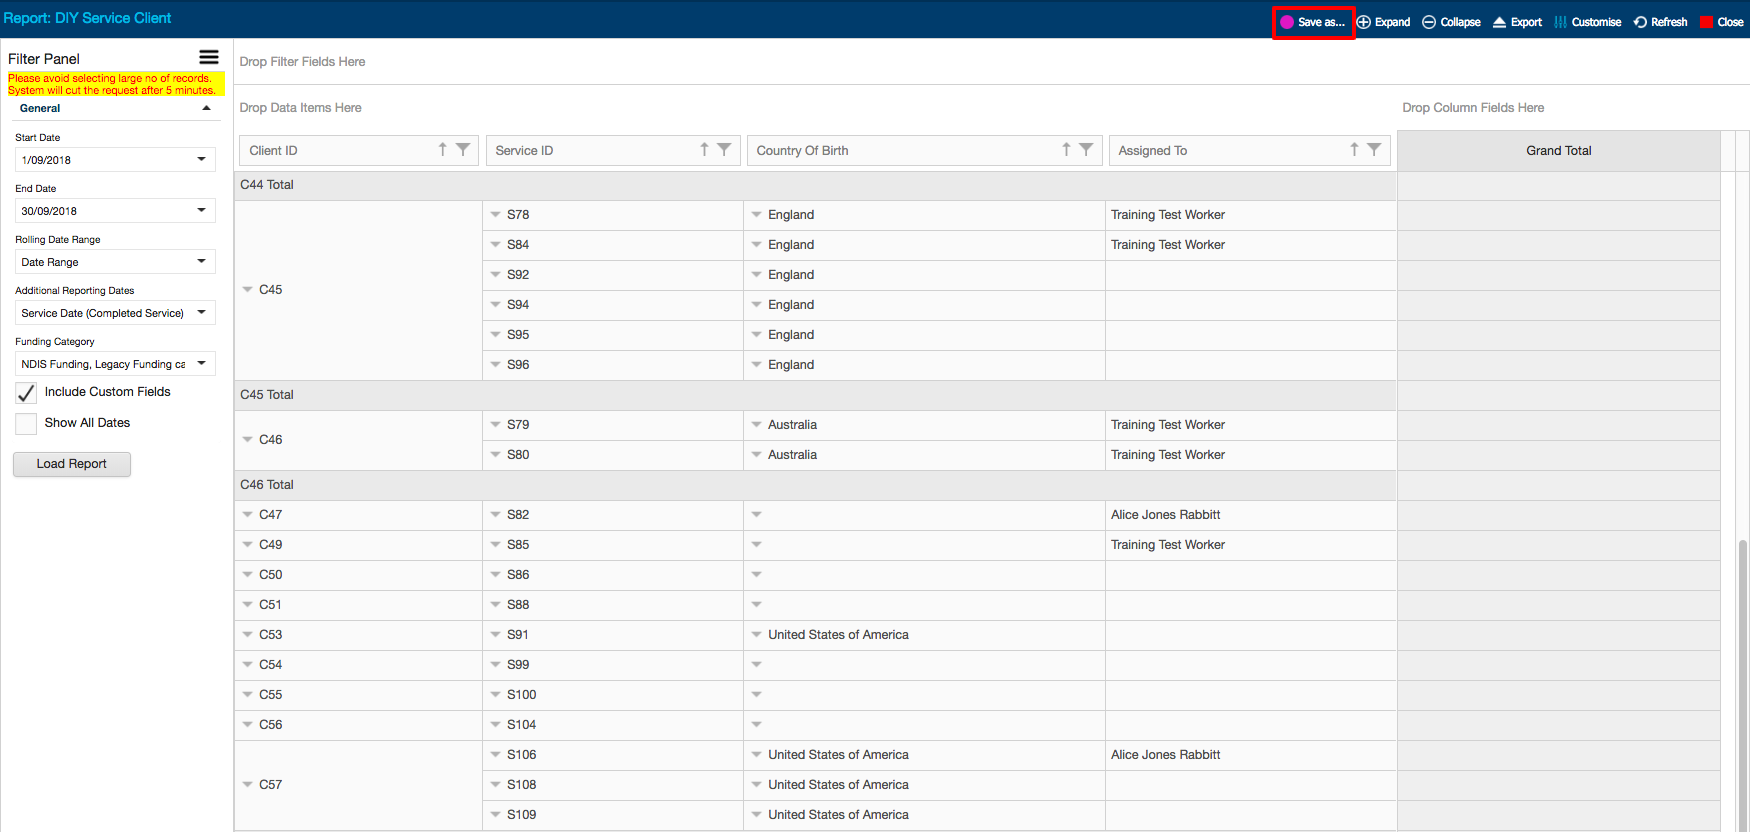
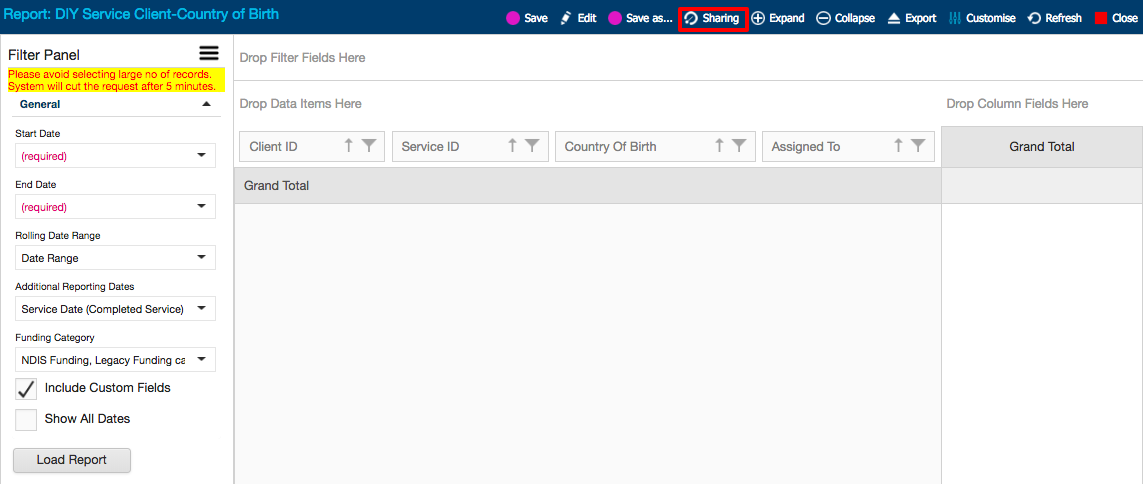
Once you have exited the original template report and opened your newly created DIY report, you will see a 

button near the top right controls.

  • In ‘Sharing’ you can set access options for the report by roles, on the left, or by individual workers, on the right. Individual worker access options trump role access options.
  • There are five ‘Sharing Type’ options: None, Locked, Locked with Filters, Unlocked Save As, Unlocked Editable. None is the lowest (no access to the newly created report at all; not visible), and Unlocked Editable is the highest level of permission. 
  • Think about the purpose of the report and who will need access. If it is for everyone, use the role setting for an appropriate level of access (e.g. read/run report for volunteer up, edit for admin up), if it is for a few workers only, use individual access options.
Search